Bloodborne Map Guide: Navigate Every Location & Boss
Discover the ultimate bloodborne map guide to master Yharnam, uncover hidden shortcuts, locate key items, and navigate every terrifying zone.
Published: Bloodborne Wiki Editorial Team
Table of Contents
Understanding the Interconnected World of Yharnam
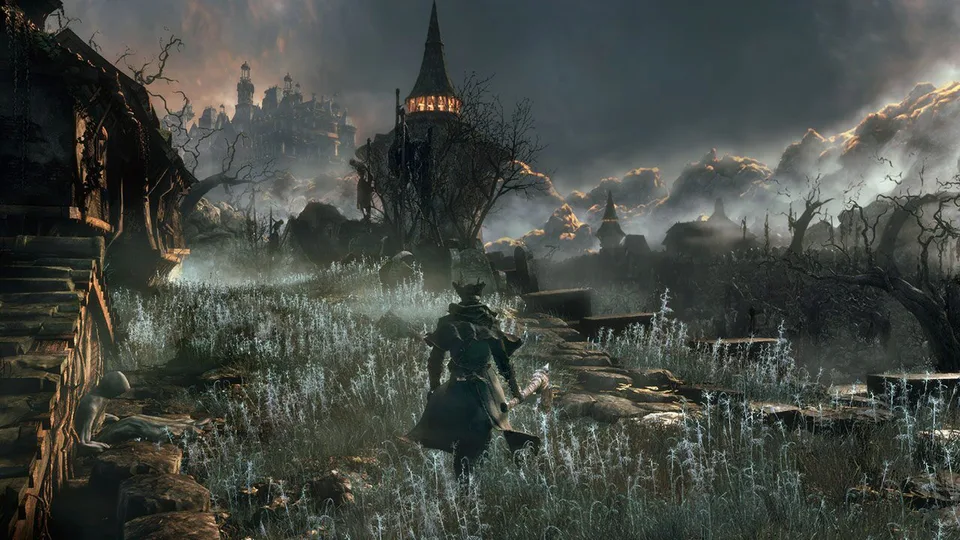
Navigating the labyrinthine streets of FromSoftware's masterpiece can feel overwhelming, which is why a reliable bloodborne map is essential for every hunter stepping out of Iosefka's Clinic. Unlike traditional level-based action games, Yharnam is a masterclass in architectural interconnectivity, where locked gates, hidden elevators, and rooftop pathways loop back to familiar lamp checkpoints. As you study any comprehensive bloodborne map, you will notice how early areas like Central Yharnam physically connect to later districts like Cathedral Ward, rewarding thorough exploration with precious shortcuts.
According to community feedback and player experience, many newcomers struggle because they miss pivotal levers and side doors that drastically cut down corpse-run distances. For instance, dropping a specific ladder in the opening street transforms a grueling twenty-minute trek into a quick thirty-second sprint. By understanding how these regional layouts weave together, you can save countless hours of trial and error while hunting beasts through the fog-shrouded alleyways.
Awaken in the Hunter's Dream: Acquire your starting weapons from the steps near Gehrman after your initial encounter with the werewolf.
Unlock Central Yharnam's Main Gate: Pull the nearby lever to drop the ladder, creating a permanent loop back to the first lamp.
Establish Cathedral Ward Connections: Use the Hunter Chief Emblem or defeat the Blood-Starved Beast to open the gates leading toward Vicar Amelia.
Discover Optional Areas: Venture down into Old Yharnam or explore Hemwick Charnel Lane to gather upgrade materials and unlock specialized covenants.
Early Game Navigation: Central Yharnam and Old Yharnam
The journey begins in the grim medical facility before opening up into Central Yharnam, a dense urban sprawl filled with aggressive crowds and patrolling beasts. Utilizing a detailed bloodborne map for this sector helps players pinpoint the exact locations of the Cleric Beast and Father Gascoigne. While the Cleric Beast serves as an entirely optional first boss, defeating him grants the Sword Hunter Badge, which unlocks crucial inventory items back at the Hunter's Dream hub.
Venturing deeper reveals the downward path into Old Yharnam, a derelict district guarded by Djura's relentless Gatling gun fire from atop a looming tower. Player experience indicates that managing your positioning to stay out of his line of sight is vital before you can confront the Blood-Starved Beast in the Church of the Good Chalice.
Central Yharnam
The starting urban hub featuring tight alleyways, patrolling mobs, and crucial shortcuts connecting back to the initial lamp. Key targets include the Cleric Beast and Father Gascoigne.
Old Yharnam
A ruined, beast-infested lower district characterized by hanging carcasses and sniper fire. Defeating the Blood-Starved Beast here unlocks the Healing Church Workshop elevator.
The following table breaks down the key early-game locations, their primary bosses, and the major traversal milestones associated with them:
Location Name
Mandatory Boss
Optional Boss
Key Unlock / Reward
Central Yharnam
Father Gascoigne
Cleric Beast
Sword Hunter Badge, Lamp Shortcuts
Old Yharnam
Blood-Starved Beast
None
Healing Church Workshop Access
Cathedral Ward
Vicar Amelia
Witches of Hemwick
Forbidden Woods Password, Eye of a Blood-Drunk Hunter
Hemwick Charnel Lane
None
Witch of Hemwick
Caryll Rune Workshop Tool
Mid-Game Traversal: Cathedral Ward and the Forbidden Woods
Once you defeat Vicar Amelia and examine the grand skull on the altar, the game transitions from evening to night, drastically altering enemy behaviors across the city. Navigating the expansive Cathedral Ward and the sprawling, serpentine Forbidden Woods requires careful reference to a reliable bloodborne map. The Forbidden Woods act as a confusing labyrinth filled with hidden pathways, traps, and hostile villagers who can transform into horrifying serpentine monstrosities.
According to community reports, players frequently lose their way in the swampy basin of the woods before reaching the Shadow of Yharnam boss encounter. Successfully navigating past these cloaked watchers grants access to Byrgenwerth College, a small academic outpost sitting beside Moonside Lake where Master Willem looks out toward the water. Defeating the vacuous Rom in this lake triggers the dramatic blood moon phase, shifting the entire atmosphere of Yharnam.
Tip
Always check behind buildings and under stairwells in the Forbidden Woods; many hidden paths lead directly to crucial NPC safe havens, unique runes, and shortcuts back to the lamp.
Endgame Areas: Yahar'gul, Nightmares, and Optional Castles
As the blood moon rises, familiar locations transform into nightmarish versions of themselves. Yahar'gul, the Unseen Village, becomes crawling with monstrous spider statues, laser-shooting amalgamations, and relentless hunters. Utilizing a specialized bloodborne map for Yahar'gul helps players avoid devastating ambushes near the Advent Plaza while hunting down the One Reborn. Beyond this point, players gain access to the Lecture Building and the desolate expanses of the Nightmare of Mensis.
The Nightmare of Mensis introduces an oppressive frenzy mechanic courtesy of an unseen eye of Sauron pulsing from the upper castle. Players must carefully time their cover usage, ascend the perilous cliffs, and eventually confront Micolash, Host of the Nightmare, before facing Mergo's Wet Nurse. Meanwhile, optional endgame zones like the snow-swept Cainhurst Castle and the eerie Upper Cathedral Ward offer some of the most challenging boss fights and lore secrets in the entire game.
Warning
In the Nightmare of Mensis, lingering too long in open sightlines will rapidly build up your Frenzy meter, leading to instant character death regardless of your current health pool.
The following comparison table highlights the unique traversal hazards and atmospheric shifts found in the game's major late-game and optional zones:
Endgame Zone
Primary Hazard / Threat
Associated Boss
Unique Reward / Item
Yahar'gul, Unseen Village
Laser-shooting statues & Reborn mobs
The One Reborn
Upper Cathedral Key
Nightmare of Mensis
Frenzy-inducing eye light & Spiders
Mergo's Wet Nurse
Third Umbilical Cord
Cainhurst Castle
Lethal gargoyles & Noble ghosts
Martyr Logarius
Vilebloods Covenant Access
Upper Cathedral Ward
Brainsuckers & Cosmic aliens
Ebrietas, Daughter of the Cosmos
Great Isz Chalice
DLC Expansion and Chalice Dungeons
For hunters seeking an even greater challenge, The Old Hunters expansion introduces the blood-soaked nightmare version of the Cathedral Ward, the twisting Research Hall, and the desolate Fishing Hamlet. Navigating the verticality of the Research Hall requires raising and lowering central staircases, while the Fishing Hamlet demands cautious exploration to survive the brutal dual-shark giant encounter in the underground well.
Simultaneously, exploring procedural Chalice Dungeons offers a completely different cartographic experience. By utilizing ritual materials, chalices, and glyphs, players can descend into deep subterranean tombs. Conquering these multi-layered dungeons—culminating in the grueling depth-five Pthumeru Ihyll dungeon—requires mastering specific bosses like the Watchdog of the Old Lords and ultimately facing Queen Yharnam herself for the ultimate platinum trophy achievement.
[ ] Defeat Vicar Amelia and acquire the Eye of a Blood-Drunk Hunter to enter the DLC.
[ ] Clear the Research Hall staircase mechanism to access Lady Maria.
[ ] Gather sufficient ritual materials like Red Jelly for advanced Chalice Dungeons.
[ ] Defeat Blood-Starved Beast to unlock the foundational Pthumeru Chalice ritual.
Frequently Asked Questions
Why is a bloodborne map necessary for new players?
Yharnam features complex, interconnected architectural layouts with numerous hidden shortcuts and dead ends. A bloodborne map helps players efficiently locate essential lamps, keys, and boss gates without unnecessary backtracking.
Can I skip optional areas like Old Yharnam?
Yes, you can purchase the Hunter Chief Emblem from the shop after defeating the Cleric Beast to open the main gate in Cathedral Ward, though skipping Old Yharnam means missing valuable upgrade materials and side quests.
How do I access the DLC areas using navigation tools?
After defeating Vicar Amelia and advancing the game to evening, allow yourself to be grabbed by the amygdala outside Oedon Chapel while possessing the Eye Item to enter the Hunter's Nightmare.
Where do I find the bloodborne map for Chalice Dungeons?
Unlike the main game, standard Chalice Dungeons are procedurally generated across multiple depths, though fixed layout layouts and community glyph maps can be found on dedicated community wikis.